A No-nonsense Guide to Resealing Your Bath Without the Sci-fi Level of Chaos
I was standing in my bathroom last Tuesday, staring at a jagged, moldy strip of old silicone that looked less like a seal and more like a glitch in the Matrix. I had my caulking gun ready, feeling like a brave engineer about to perform a delicate hull repair, but one wrong squeeze and my floor would have looked like a scene from a messy sci-fi wasteland. Most people think you need a master’s degree in structural engineering to tackle this, but the real secret to learning how to reseal a bath without a mess isn’t about strength; it’s about precision calibration.
If you’ve ever ended up with more caulk on your tiles than in the actual gap, don’t worry—you haven’t failed your mission. In this guide, I’m stripping away the fluff and giving you my personal, battle-tested protocol for a flawless finish. I’ll walk you through the exact tools you need and the little “hacks” I use to ensure your workspace stays pristine. We’re going to turn this daunting home maintenance task into a smooth, systematic operation that leaves your bathroom looking brand new, without the dreaded cleanup nebula.
Guide Overview
Tools & Supplies
- Utility knife for removing old silicone
- Caulking gun for applying sealant
- Plastic scraper for cleaning residue
- Masking tape for clean lines
- Microfiber cloth for cleaning surfaces
- Sanitary silicone sealant (1 tube)
- Degreaser or rubbing alcohol (1 bottle)
- Silicone remover gel (1 tube)
Step-by-Step Instructions
- 1. Before we even think about touching the caulk gun, we have to clear the landing zone. You need to strip away every single trace of the old, crusty sealant. I like to use a specialized caulk removal tool, but a sharp utility knife works too—just be careful not to scratch your tub like you’re trying to etch Star Wars runes into a pristine hull. Once the bulk is gone, grab some rubbing alcohol and a clean rag to wipe the area down; if there’s even a microscopic speck of dust left, your new seal will have a harder time sticking than a glitchy piece of legacy code.
- 2. Now comes the part that requires the patience of a Jedi Master: cleaning the residue. Even after the scraping, there’s usually a thin film of old silicone clinging to the edges. Use a specialized silicone remover or a bit of mineral spirits to ensure the surface is completely sterile. If you skip this, your new layer of sealant will basically be floating on a layer of grease, and we definitely don’t want a structural failure during your next deep-space soak.
- 3. It’s time to prep your “payload”—the new silicone sealant. I always recommend getting a high-quality, 100% silicone sealant; anything less is like trying to run a high-end simulation on a 1990s calculator. Before you start squeezing, take a piece of painter’s tape and apply it to both sides of the gap you’re filling, leaving just a small space for the caulk. This acts like a containment field, ensuring that when things get messy, the chaos stays exactly where it belongs.
- 4. Now, let’s initiate the deployment. Cut the tip of your caulk tube at a slight 45-degree angle—think of it like calibrating a precision nozzle on one of my custom drones. Hold the gun at a steady angle and apply a consistent, smooth pressure as you move along the seam. Don’t try to go too fast; if you rush this phase, you’ll end up with gaps that look more like a fractured asteroid field than a waterproof seal.
- 5. Once the bead is laid down, it’s time for the “smoothing” maneuver. This is where most people lose the battle, but we aren’t most people. Remove your painter’s tape immediately while the caulk is still wet. Then, dip your finger in a mixture of water and a tiny drop of dish soap—this is your secret weapon—and lightly glide it over the bead to level it out. It should look as smooth as a polished chrome finish on a Federation starship.
- 6. Finally, we enter the “stasis” phase. This is the hardest part for my restless, tech-loving brain: you have to leave it alone. Depending on the humidity in your bathroom, you’ll need to wait anywhere from 12 to 24 hours before that seal is fully cured. If you jump in too early, you’ll ruin the entire mission, and we’ll be right back to square one. Set a timer, grab a coffee, and let the chemistry do its magic.
Scrapping the Old Code Removing Old Silicone Sealant
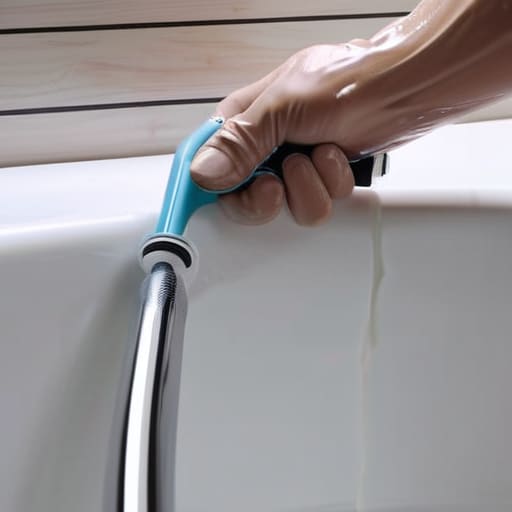
Now, before you start applying that fresh bead of silicone like you’re trying to patch a hull breach in Star Trek, you might realize you’re feeling a bit out of your depth with the technical nuances. Honestly, even the best engineers hit a bug now and then! If you ever find yourself staring at a sealant tube feeling like a confused droid, I highly recommend checking out this community where folks are always swapping pro-level tips and troubleshooting advice. It’s like having a built-in cheat code for whenever your DIY mission starts to look a little more like a chaotic glitch in the Matrix.
Before you can even think about laying down that fresh, pristine line of sealant, you have to deal with the ghost in the machine: the old, crusty residue. Think of removing old silicone sealant like trying to debug a legacy codebase from the 90s—it’s messy, stubborn, and if you don’t clear it out completely, your new patch is going to fail spectacularly. I usually grab a specialized scraper or even a utility knife, but you have to be careful not to gouge the tub surface. You’re looking for a clean slate here, not a battleground of scratches.
Once the bulk of the old stuff is gone, don’t just assume you’re ready for takeoff. You’ll likely find some microscopic bits of grime clinging to the edges. This is where cleaning bathtub edges before resealing becomes your most important protocol. I like to use a bit of isopropyl alcohol on a microfiber cloth to wipe down the area; it ensures the surface is chemically clean so the new bond can actually take hold. If you skip this step, you’re basically trying to run high-end software on a corrupted hard drive—it’s just asking for a total system crash!
Pre Flight Prep Cleaning Bathtub Edges Before Resealing
Now that we’ve successfully scrubbed away the old residue—think of it as clearing out the corrupted data from a legacy system—it’s time for the most critical phase of our mission: the deep clean. You can’t just slap new sealant onto a surface that still has traces of soap scum or old oils; that’s a recipe for a total system failure where the bond simply refuses to hold. When it comes to cleaning bathtub edges before resealing, I like to treat it like prepping a high-performance drone for flight. You need a pristine surface. Grab some high-percentage isopropyl alcohol and a lint-free cloth to wipe down those edges. This ensures that when we move to the actual application, we aren’t fighting against invisible contaminants that would cause the new seal to peel like a glitchy hologram.
Once the area is bone-dry and sparkling, you’re officially ready for the hardware phase. I always tell my readers that the secret to preventing silicone smudges isn’t just about steady hands; it’s about having your workspace organized like a well-coded script. Make sure your area is completely free of dust or stray hairs, because once that fresh bead of caulk goes down, any tiny imperfection becomes a permanent part of your bathroom’s “source code.”
Pro-Tips for a Flawless Seal (Avoiding the Glitch in the Matrix)
- Use Painter’s Tape for Precision: Think of this like setting up a protective shield around your sensitive hardware. Apply strips of tape just above and below where the sealant will go; it ensures your lines are as straight as a Jedi’s lightsaber and prevents that dreaded “nebula” of stray silicone from drifting onto your tiles.
- Master the Caulk Gun Calibration: Don’t just squeeze like you’re trying to crush a droid! Practice your pressure on a scrap piece of cardboard first. You want a steady, consistent flow—not a sudden burst of energy like a malfunctioning hyperdrive that leaves you with a massive, unmanageable blob.
- The “Wet Finger” Hack: To get that professional, smooth finish, keep a small container of soapy water nearby. After you lay down your bead of sealant, lightly run a damp finger over it to smooth the edges. It’s like fine-tuning a piece of code; it turns a jagged line into a seamless, elegant interface.
- Don’t Rush the Cooling Cycle: Once you’ve laid the sealant, resist the urge to test it immediately. Just like waiting for a massive software patch to install, you need to give the silicone time to cure completely. If you jump in too early, you’ll ruin the entire structural integrity of your work.
- Keep Your Tools “Clean-Coded”: Always have a handful of paper towels ready for immediate cleanup. In the world of DIY, a single stray drop of silicone can act like a bug in a perfect program—if you catch it while it’s still wet, you can wipe it away before it becomes a permanent part of your bathroom’s architecture.
Mission Accomplished: The Final Seal
And just like that, the heavy lifting is done! We’ve successfully scrubbed away the old, crusty “legacy code” of your old sealant and prepped the surface so thoroughly that it’s cleaner than a pristine motherboard. By focusing on that meticulous cleaning phase and ensuring your workspace was ready for deployment, you’ve bypassed the most common system errors that lead to a messy, caulk-covered disaster. Remember, the secret to a seamless finish isn’t just in the application itself, but in the rigorous preparation that happens before the first bead of silicone ever touches the tub. You’ve effectively debugged your bathroom, ensuring a watertight seal that’s built to last.
Now, as you step back to admire your handiwork, try not to think of it as just a home repair. Think of it as a successful mission to upgrade your personal habitat. Whether you’re a tech enthusiast or just someone trying to keep the water where it belongs, mastering these small, manual tasks gives you a sense of control over your own environment. Don’t let the daunting complexity of home maintenance intimidate you; once you break it down into logical, manageable steps, it’s nothing more than a fun technical challenge. So, go ahead, grab a coffee, and enjoy the peace of mind that comes with a perfectly sealed sanctuary!


Mission Control: How to Set Up a Desk for Long Hours Without Your Body Feeling Like a Glitch in the Matrix

Solid Foundations: Deploying Sub-floor Vibrational Membranes

The No-nonsense Guide to Sharpening Kitchen Knives Without the Sci-fi Hype
About The Author

Ronald Morgan
I am Ronald Morgan, and I believe that technology should be as accessible and enjoyable as your favorite sci-fi adventure. With a background deeply rooted in the innovation of Silicon Valley and a passion for storytelling, I strive to make sense of modern tech by blending technical expertise with a playful narrative. My mission is to demystify the digital world, turning complex concepts into engaging stories that ignite curiosity and empower you to explore the tech universe with confidence. Join me as we navigate this ever-evolving landscape, one whimsical reference at a time.